Authorization
To use the Azure Data Factory blueprints you will need the following values:
- Client ID
- Client Secret
- Tenant ID
- Subscription ID
See below on instructions on how to retrieve these values
Register App
- Login to Azure Portal
- Search for "App Registration"
 3. Click "New App Registration"
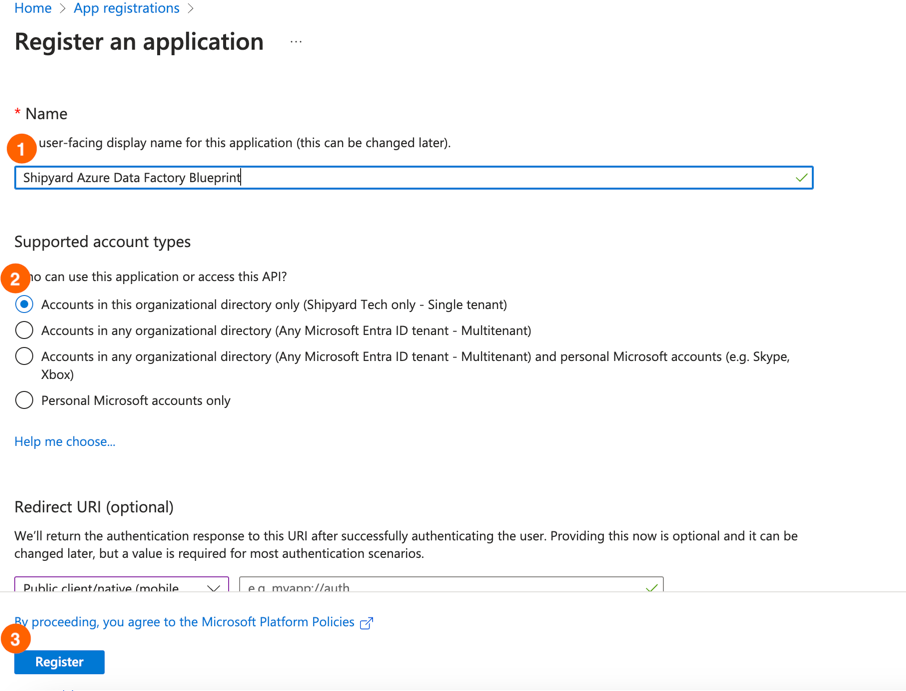
4. Fill out the form on the next page:
3. Click "New App Registration"
4. Fill out the form on the next page:
- Name: Enter your app name.
- Supported account types: Select "Single Tenant".
- Click Register.
 5. Note the following information:
- Application (client) ID: For Client ID.
- Directory (tenant) ID: For Tenant ID.
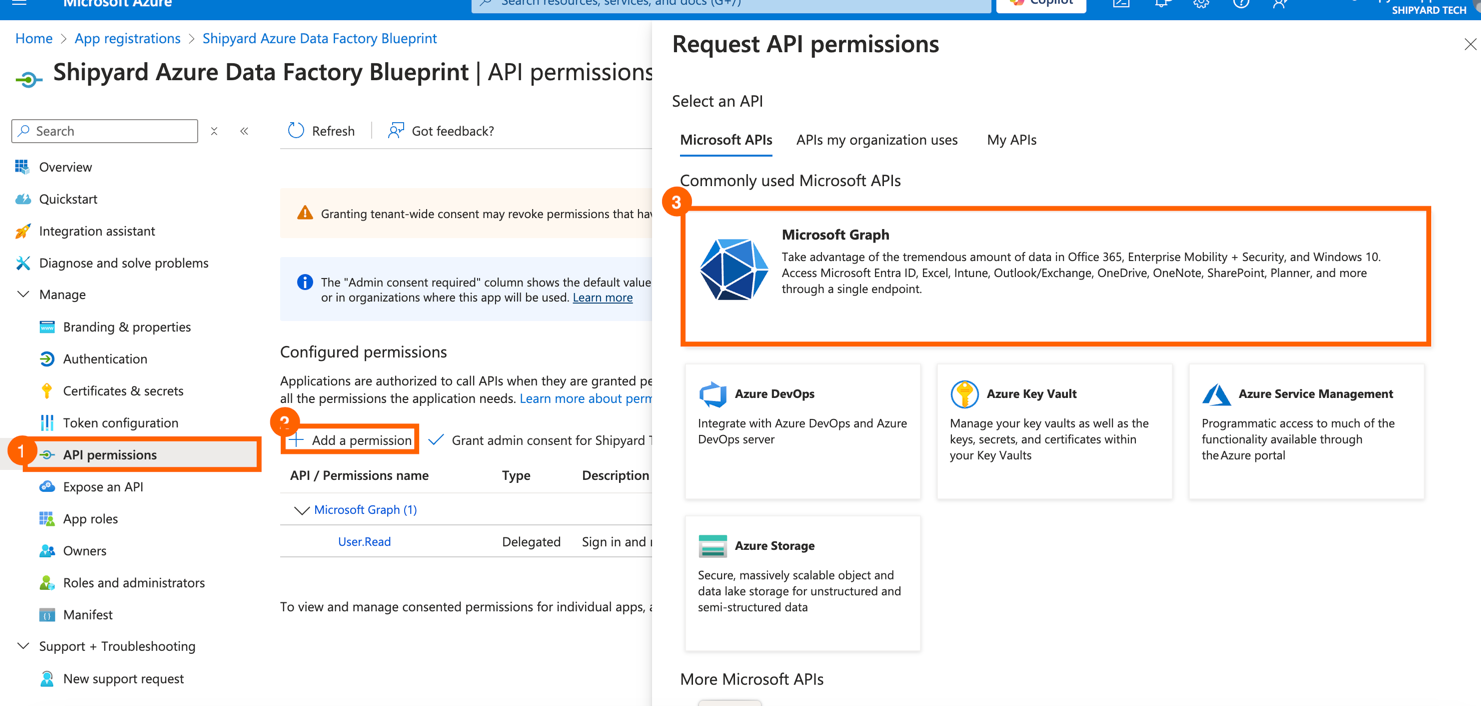
- Set API Permissions:
- Click API Permissions on the left pane.
- Click Add a Permission > Microsoft Graph.
- In the next window, click Application Permission.
- Add the
Application.ReadWrite.Allpermission. - Click Add Permission.
 7. Grant Admin Consent:
- Click Grant Admin Consent.
- If you are not an admin, your admin will need to grant the permission.
Add a Client Secret:
Click Certificates and Secrets on the left pane.
Click New Client Secret.
Provide a description and select an expiration period.
Copy the generated value for Client Secret.

Configure Subscription Access
- Go to the Azure portal homepage.
- Search for "Subscriptions".
 3. Note the Subscription ID for the Subscription ID field.
4. Select the subscription you want the app to have access to.
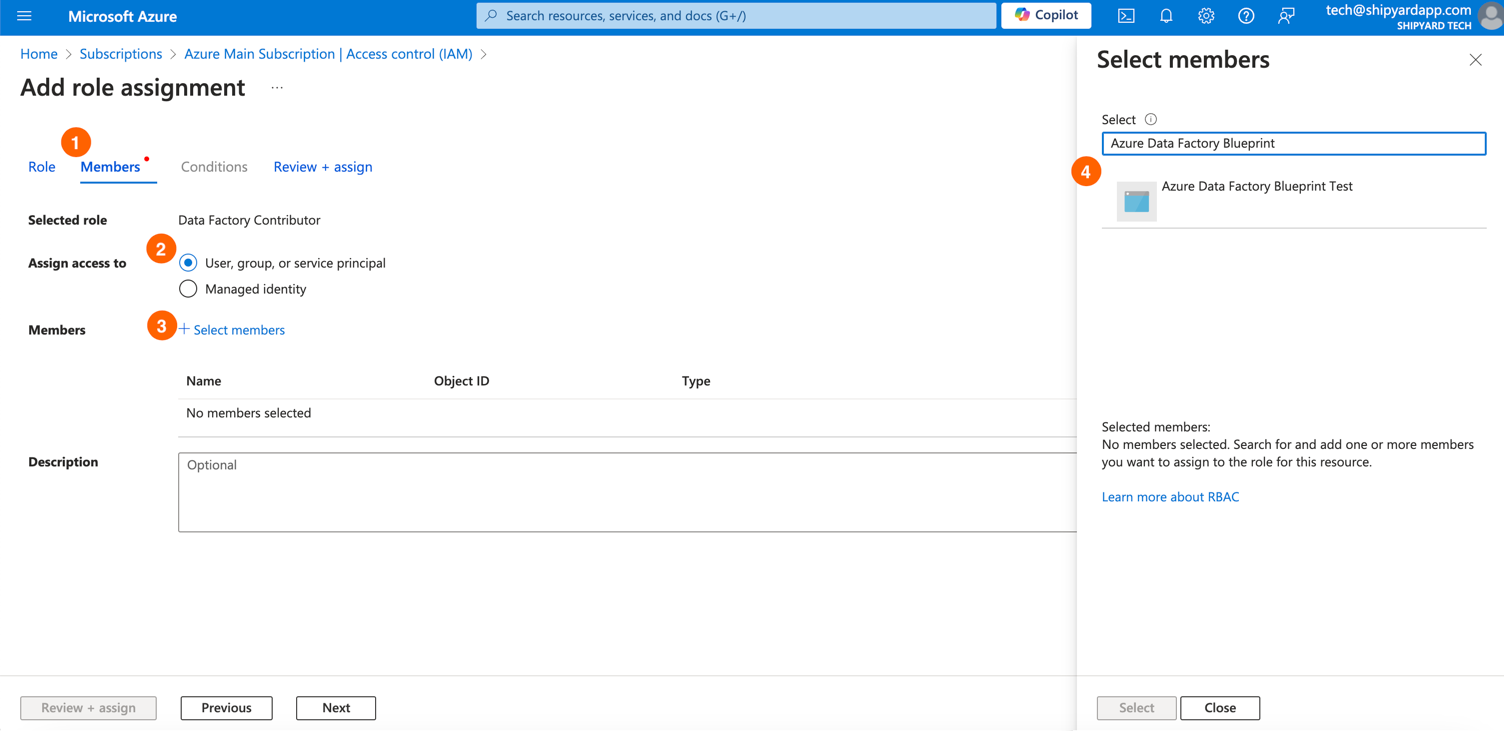
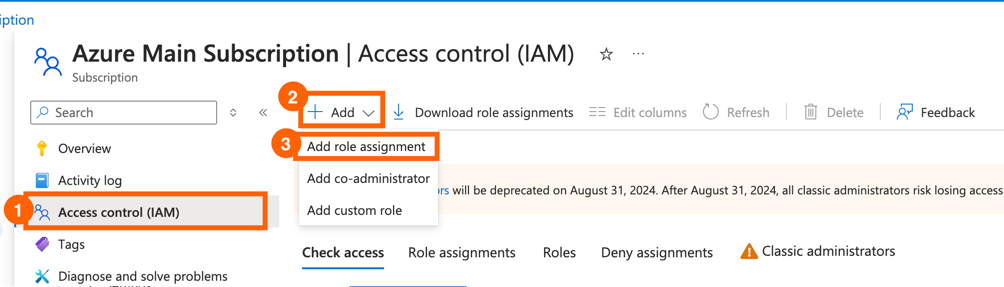
5. Set Role Assignment:
3. Note the Subscription ID for the Subscription ID field.
4. Select the subscription you want the app to have access to.
5. Set Role Assignment:
- Go to Access Control (IAM).
- Click Add > Add Role Assignment.
- Search for Data Factory Contributor.
- Click Next.
- Click Add Member.
- Search for the app name.
- Click Select.
- Click Next.